Archive

Archive for the ‘Music Technology’ Category

Ground rules for being a Gig Rack beta tester

September 10th, 2016 Comments off

Our beta testing program is a great opportunity for us to discover and fix bugs and important features and for our beta testers to get to know and influence the creation of a new software product before it is released to the general public.

Here are some basic guidelines on how to help us make The Gig Rack be the best application in its class.

  1. Make sure you are using the latest beta version available. Always check for updates.
  2. Please include as much information as you can about any problem you encounter. We need detailed information so that we can track down the problem. For example,
    • What you were trying to do when it crashed
    • What error messages (if any) appeared – be very specific. The exact content of an error message can be extremely helpful.
  3. Can you reproduce the error? Tell us in detail the steps we need to follow to reproduce the problem. If the problem is intermittent, how often does it happen? Can you see any patterns in how you were using the program when it crashed?
  4. Details are critical. For example,
    • Does your problem occur with a specific plugin or with any plugin?
    • Is it a VST or AU plugin?
    • Is it an old plugin or the latest version? If it’s an older version, what happens if you update to the latest version
    • Is your plugin legal? We’re not going to spend time trying to debug a problem that is due to consequences of cracking plugins.
  5. Tell us about your environment. For example,
    • Confirm what version of The Gig Rack you are running
    • How much RAM is in your computer
    • What version of the OS are you running
    • What kind of audio interface are you using
    • Are your keyboards connected by MIDI or USB
  6. What can we do to improve the Gig Rack to make it even better for your needs? For example,
    1. Are there features we include that you would like to see done differently? If so, how?
    2. What features would you like to see that are currently not available?


My keyboard rig for the Security Project

August 16th, 2012 Comments off

The Security Project was created early in 2012 to perform the early music of Peter Gabriel. A key feature of this project was the inclusion of musicians who performed or were otherwise involved with Peter Gabriel the first time around, about 30 years ago. I was invited to join this project a couple of months later and we just performed our first show at B.B. King in NYC on August 11th.

Update (Feb 12th, 2013): The Security Project just completed a short tour in the Northeast in four states, ending with a second performance at B.B. King in NYC.

Update (April 16th, 2014): The Security Project just completed another tour that included about 12 shows in the Northeast and a couple of shows in Canada (Montreal and Quebec City). A highlights video from that tour can be found here.

A number of people have asked me to describe the keyboard environment I am using for this project. Given that there is in fact much more going on than can be seen from just looking at it from a distance, I figured it was time to write it up.

Keyboards

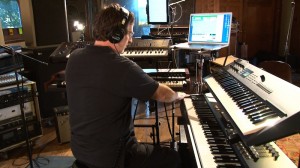
I am using four physical keyboards, set up in an L shape. An important point to understand is that there is no correspondance between any particular keyboard and any particular sound that is heard.

On my right is an Akai MPK88 weighted MIDI controller underneath a Yamaha AN1x. The Akai is nominally used for piano parts but does get used for other parts where necessary. For example, in Family/Fishing Net, I am controlling the low blown bottle sound that appears at the very beginning, the flute loop that also appears at the beginning, and then later the picolo. I’m also playing bass on it at the points where Trey plays solos. The AN1x, although nominally a full synth, is used only as a MIDI controller and its internal audio is not connected. The sliders on the Akai and the knobs on the AN1x are used to control volume and/or other real-time effects as needed.

On my left is a single manual Hammond XK3-C underneath a Korg Kronos. The Hammond is often used solely as a MIDI controller and only occasionally is its internal sound engine used, for example in the early part of Fly On A Windshield and on Back in NYC. The Korg Kronos is mostly used as a synth engine and the sounds it produces are often being played from some of the other controllers. Occasionally, I play the Kronos keyboard itself but as often as not, in that mode, the sounds that are heard are actually coming from somewhere else. (I’ll get to “somewhere else” in a moment)

Update(December 15th, 2012) : The Hammond XK3-C has now been replaced by a Nord C2D (a dual-manual organ) and provides much more flexibility in terms of both organ playing as well as effectively giving me two MIDI controllers which is very useful.

Update(July 7th, 2014): While I am still using 5 keyboards, the Kronos 61 and Nord C2D have been replaced by three Roland A800 Pro controllers. The bottom two are (by default) routed to the Gsi VB3 Hammond Emulator plugin on my laptop. The Yamaha AN1x has been replaced by a fourth Roland A800 Pro and the Akai weighted controller has been replaced by a KronosX 88 which now takes on both the roles of synth engine where needed and weighted controller.

Pedals

On the floor, under each pair of keyboards, is a Roland FC300 MIDI pedal controller. As well as five foot switches, there are also two built-in expression pedals. Several extra expression pedals are also plugged into the unit. These pedals perform different operations, depending on the song. For example, in Rhythm Of The Heat, foot switches are used to turn on or off the background single string note that is played throughout much of the song as well as the deep percussive Pitztwang note that comes in at the end of many vocal phrases. In Humdrum, the same footswitches are used to emulate the deep Taurus bass notes that are heard in the last section.

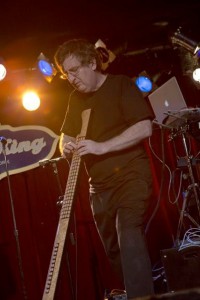
Eigenharp

The Eigenharp is a highly sensitive controller that transmits high speed OSC data as keys are played. The keys on the eigenharp detect motion in three dimensions and are extremely sensitive, allowing guitar or violin style vibrato to be easily played. In San Jacinto, I am controlling the volume of the three marimba loops. I am also playing the string orchestra part in the middle (actual sound was coming from the Korg Kronos) and then the Moog bass and steampipe sounds at the end. Those last two are produced by two soft synths running on my laptop, more on this later.

iPads and iPhone

An iPhone and one of my iPads are used to run Lemur, an app that implements a touch sensitive programmable control surface (with sliders, buttons, knobs and so forth). These are used for real time control of various sounds. The iPhone was used to start the whole show from the back of the room, where a touch of a button triggered the Rhythm Of The Heat loop that is present though most of the song. It was also used to generate the same Pitztwang sound when I was not behind the keyboards and able to reach the pedal.

A second iPad runs Scorecerer, a product developed by my company that displays sheet music and annotations as well as sending commands back to the computer to change all settings as we move from one song to the next in the set list.

Update (November 2014): A third iPad has now been added whose sole purpose is to display a small portion of the laptop display, the part showing current knob assignments. The laptop itself is no longer raised up and so its screen is less visible.

Rack

On the floor between the two sets of keyboards (and under the computer stand) is a rack containing two MOTU 828 MkIII audio interfaces a MOTU MIDI Express XT (an 8 port MIDI interface), the base-station for the Eigenharp, a network ethernet/wifi router and a power supply for the entire system. Power, audio, MIDI and USB connections (as required) from keyboard controllers and pedals are connected directly into this rack. The MOTU 828s allow me to route each sound generator (e.g., VST instruments, VST effects, Max audio, external audio from the organ and Kronos)  to independent audio output channels that go to FOH and . It is also connected to an audio receiver that returns a feed of all the instruments (except my keyboards) from the monitor mix. That feed is then mixed back in with the keyboards so that I can control how much of my rig I hear relative to the rest of the band. The router is used to allow the iPhone and iPads communicate with the computer. The reason for  many audio outputs is so that different kinds of sounds can be EQ’d seperately and so that the volume of sequences can be controlled relative to other keyboard sounds for monitoring by other band members.

Update (Feb 1st, 2013): The latest version of the CueMix software that controls the MOTU 828s now responds to OSC for remote control. Consequently I have added a third iPad (iPad Mini) that runs TouchOSC with templates for the MOTU hardware. That allows me to easily adjust the volume of the band mix I’m receiving without having to interact directly with the computer. Ultimately, I’ll take some time to reverse-engineer the actual OSC data that’s being sent out after which I will be able to use MaxMSP (see next section) to send the same data, thereby allowing me to control that volume from a slider on one of my keyboards rather than having a third iPad.

Update (Jan 12th, 2014): The two MOTU 828s have been replaced with two RME UCX audio interfaces. The benefits are improved sound quality as well as reduced latency and improved driver performance. The CueMix software has been replaced by RME’s software called TotalMix for which there is also OSC support and an iPad app so everything else remains unchanged.

Computer

The entire system is completely controlled by a Macbook Pro running custom software I developed using the MaxMSP programming environment. A description of the custom software can be found in other blog entries on this site and the extensions I developed to integrate the Eigenharp into MaxMSP can be found here.

Everything that happens is processed through this software environment. When a song request is received (from the iPad running Scorecerer), MaxMSP will load all the required soft synths, set up the appropriate MIDI routings (i.e, which parts of which keyboards play which sounds), route the audio to the appropriate outputs on the MOTU device and respond to real time controllers (knobs, sliders, buttons and pedals as well as the Eigenharp) to control volume and other parameters (e.g, filter cutoff, attack, decay, reverb or whatever is needed) for the specific song.  MaxMSP is also responsible for generating the real-time loops, both MIDI and audio and in some cases is also adding extra harmonies depending on what I’m playing.

Here is an example of some of the configuration created in MaxMSP for San Jacinto.

Soft synths and effects

While some of the sounds heard are coming from the Korg Kronos and Hammond organ (even if they’re not being played from their respective keyboards), a variety of audio plugins are in use. The most important of these are Native Instruments Kontakt and Reaktor, the GForce Oddity and Minimonsta (yep, Arp Odyssey and Minimoog emulators respectively), and the AAS UltraAnalog. Effect processing is mostly done with Native Instruments GuitarRig and IK Multimedia AmpliTube. However, some effects are done directly with MaxMSP. I used to use Arturia plugins (I love their Moog Modular and Arp 2600) but I had too much grief with their copy-protection scheme and so had to drop them.

Credits

Jerry, Trey, Michael and Brian are amazing!

Larry Fast provided me with samples and loops for some of the songs and his guidance and insights as to how some sounds were originally created and performed was absolutely critical to recreating the experience.

Jim Kleban provided me with great information as well as RMI and ARP Prosoloist samples for the Genesis songs we performed from the Lamb album.

I’d also like to thank the support team at Cycling74 as well as many users on the Cycling74 support forums. MaxMSP was a core component in making this project workable.

Norman Bedford gets a prize for organizational expertise.

Finally, my heartfelt thanks to Scott Weinberger for inviting me into this project and giving me the opportunity to achieve one of my lifelong dreams.

Conclusion

I hope this information is of interest and please feel free to submit comments and questions. I’ll do my best to respond as time permits.

Using Max with the Eigenharp Alpha

April 26th, 2012 Comments off

April 26th, 2012

A new website has been created that focuses specifically on using Max with the Eigenharp. Please visit http://max4eigenharp.com for more details as well as for the Max patchers to support the Eigenharp.

Replace Apple MainStage with a Custom Max/MSP Implementation (Part 4)

February 2nd, 2012 5 comments

Well, it has been a few months since I wrote the previous articles on my development of a custom alternative to Apple MainStage. After using it for a few months, I started to figure out what else I really needed and as of today, I am comfortable that I have created an update worthy of being called version 2 (or I suppose I should call it version 2012!)

It’s going to take a while to finish this article and I’ve decided to make it visible along the way, otherwise I can’t say how long it will be before I finish it. Of course, having it visible before it’s finished will most likely act as a catalyst to get it finished ASAP.

The key new features of this version are

  • Persistence
  • Audio mixer
  • External audio routing
  • Better encapsulation

1) Persistence

The one feature that MainStage (and other similar systems) had that was missing in my library was the ability to remember the state of parameters so that the next time a song was loaded, any parameters that were changed in real time while the song was previously loaded would be automatically recalled.

2) Audio mixer

I use a MOTU 828 MkIII + MOTU 8Pre and up until now I was just using MOTU’s CueMix application to do basic volume control. However, CueMix has two flaws: a) no remote control over the mixer and b) no way to process audio through software (e.g, VST effects).

I am now explicitly routing all audio through Max objects. As you will see, there have been some nice benefits to this design. Further, I have not observed any latency issues, something that was of concern to me. The mixer has channel strips with the ability to send signals to VST effects.

3) External audio routing

The new mixer supports my external audio devices (keyboards, synths, guitars, vocals) and those can also be processed with VST effects. This will in fact allow me to get rid of quite a few external stomp pedals.

4) Better encapsulation

Among other things, I have taken the [GenericVST] object and wrapped it inside various new objects that automatically route audio to the desired mixing channel or effects send bus. It is also much easier to configure parameters of a VST and to initiate a VST edit/save cycle.

Consolidated front panel

Here’s a picture of the latest version of my consolidated front panel. You will note that it has changed significantly from the original version I described when I first started this effort. (Click the image to see a larger view)

Apart from all the extra stuff in there (compared to my original version), the key change is that the bpatcher-based panels that represent the control surfaces for some keyboards (Akai and AN1x) as well as the panel that represents the mixer (external, VST and effects) are constructed from more primitive objects at the bottom of which are UI objects whose state can be stored and reloaded centrally.

Persistence

While Max comes with several mechanisms for managing persistence (save/restore state of a coll, the pattrstorage system, the new dict objects in Max 6), the first was too simplistic, the second was too complicated and the third was not available for Max 5.1.9 and so not evaluated. However, my persistence needs were quite specific. If you turn a dial or change a slider position, directly or via MIDI from a control surface, I want the current value of that dial or slider position to be associated with the currently loaded song so that when the song is reloaded later, the value is restored, and sent out to whatever parameter is being controlled.

Turns out that the easiest way to do this was to use a [js] Max object. The [js] object is a way to write Javascript code that can live inside Max, complete with input and output ports and a way to respond to arbitrary incoming Max messages. Javascript trivially supports associative arrays so all I needed was a scheme to uniquely name every slider and dial, no matter where it lives. To see why this is the case, I need to explain how the panels and mixer controls are actually implemented. Let’s examine a simple case first, the 8 dials that make up the AN1x control surface. First, here’s that section of the consolidated front panel again.

This is actually being displayed through a [bpatcher] object, as indicated by the light blue line around it. (That line is only visible when the patcher is in edit presentation mode.) If I drill in (i.e, open up this bpatcher), then one of the items is just the 8 dials.

Similarly, drilling into this bpatcher, we can see that there are in fact 8 separate bpatchers as well as a comment field to which we will return later.

Drilling into any one of these, we find the underlying dial and integer in an object called pdial (persistent dial). This is where the fun starts:

Note that there is also a pslider (persistent slider) object and a plabel (persistent label) object both of which are implemented in the same manner. Note that at its core, the dial can receive values whose name is #2_pdial and it can send its value out as a packed name/value pair to something called #1.

Now, #1 and #2 represent the values of two arguments that are passed into the object when it is instantiated. The first argument (whose value will be the same for all objects used in a given environment) will be the name associated with a [receive] object that will pass all incoming values into a dictionary of some kind. We will see what that dictionary looks like later.

Creating unique names for user interface objects

The second argument is much more interesting. We need a mechanism where we can end up with unique names for different dials or sliders, each of which should have little or no knowledge of what else is there. To cut a long story very short, the solution I chose was to define at every level a name consisting of whatever is passed in from the parent level concatenated with whatever makes sense for the object in question. This is easier to demonstrate than to describe.

The second dial in the AN1x console receives messages addressed to a receiver with the name

AN1x1_AN1xConsole_2_pdial

Similarly, the 4th channel strip of the MOTU mixer receives messages addressed to

MainMixer_MOTUKeyboardsMixer_4_ExternalChannelStrip_ChannelStripVol_pslider

and the lower SEND dial for for the 5th channel strip is addressed by

MainMixer_MOTUKeyboardsMixer_5_ExternalChannelStrip_ChannelStripEFX2_EffectsSend_pdial

If you parse that last one, reading right to left, it says that there is a persistent dial in an EffectsSend object which represents the second EFX of a channel strip living in an ExternalChannelStrip, the 5th channel strip contained in the MOTUKeyboardsMixer which lives (along with other things) in the MainMixer patch.

The nice thing about this is that the only objects that have to know this full name are the bottom level persistent dials, sliders and labels themselves.

Connecting with the dictionary

A Dictionary object is inserted into every top level patcher that represents a song. (Remember that each such a patcher contains the MIDI routings and VSTs that are needed to play a particular song). Here’s a view of a Dictionary as contained in a song patcher.

The single parameter is the name that will be used by all persistent objects when they send their values. It can be anything you want. In my system, this name is DHJConsole.

Here’s the contents of the dictionary patcher. (Click to open full view in a separate window)

The core that makes this work is the little javascript object near the bottom (called NVPair) that is connected to a [forward] object. The NVPair implemented an associative array with functionality to insert name/value pairs, retrieve a value given a name, operations to save or restore the array to a file and a function, called dumpall that sends out all name/value pairs.

Let’s go through the steps that occur when you turn a pdial (persistent dial) named AN1x1_AN1xConsole_2_pdial to the value 6

  1. The pdial sends out a list containing two values (AN1x1_AN1xConsole_2_pdial 6) through a [send DHJConsole] object
  2. The dictionary receives this list through the [Receive #1] (half-way down on the left hand side). Remember that that #1 will have been replaced with DHJConsole when the dictionary is actually instantiated.
  3. The text insert is prepended to the list and so the message
    insert AN1x1_AN1xConsole_2_pdial 6
    is sent into the NVPair.js object.
  4. The NVPair object creates an entry called AN1x1_AN1xConsole_2_pdial in an associative array and sets its value to 6. This is known as a name/value pair. Note that if there was already such an name in the associative array, then the previous value would just get updated to the new value, 6.

Steps like these occur whenever any persistent object is modified. The NVPair object also has functions that can save and reload all names and values.

When a patcher containing a dictionary is closed, the contents of the associative array are saved to a file whose name is the same as the patcher (but with a different extension). When a patcher containing a dictionary is opened, the contents are reloaded into the associative array and then the following steps occur automatically after the patcher has finished loading any VSTs (those are the only objects that can take quite a few seconds to load).

  1. The dumpall message is sent to the NVPair
  2. This message causes the NVPair to iterate through the array, sending out every entry as a name/value pair. This is where the fun starts.
  3. For each entry, the value will be sent out first and it gets stored in a temporary variable (the [pv value] object)
  4. The [forward] object is a variant of the [send] object that allows the name to be changed. So the name that will be used is the name that comes out of the NVPair.
  5. Therefore, the value will be sent to any receiver whose name is the same as the name that came from the NVPair.
  6. Each name will exist in one single [receive] object corresponding to the persistent object that was created, as described in the “Creating unique names for user interface objects” section above. That is how each individual user interface element is updated.

In upcoming articles, we will talk about audio mixer, routing and encapsulation.
Categories: Music Technology Tags:

Replace Apple MainStage with a Custom Max/MSP Implementation (Part 3)

September 24th, 2011 2 comments

The earlier articles are

Part 1

Part 2


I know I was supposed to write about the front panel user interface in part 3 but I got very distracted after deciding it was time to add VST support to my implementation. Up until now, Max has only been involved in MIDI routing to external synths and I was really keen to be able to leverage all the soft synths that I had acquired over time to use with MainStage.

MainStage only supports AudioUnits and Logic Studio proprietary synths and max officially only supports VSTs (although a beta au~ Max object is available here) but the good news is that pretty much all third party softsynths are provided in both AU and VST formats.

Max has an object called [vst~] but it’s quite complicated to configure. For example, take a look at the example from the Max documentation.

I’m not going to explain this here as the point of the article is to encapsulate all that stuff into a more usable form. If you want to know more about the underlying operation, see this documentation. The only thing important to note here is that all (and I mean all) control messages are sent through the first inlet.

My goal was to make it really easy to create “instruments” and use them in song patchers the same way as external MIDI synths are already supported (see my original article).

GenericVST

The key object I created is called GenericVST and it takes one argument, the name of the VST that you want to use. Here’s one that loads the free Crystal VST. By the way, if your VST has spaces in the name, then the entire name should be enclosed in quotes.

This object has 9 inlets and 2 outlets. The two outlets are Audio L and Audio R respectively and can be connected directly to the system audio output (see below) or can be connected to the audio inputs (the last two inlets of the object) of another GenericVST object for effects processing.

Inlets (from left to right)

  1. Patchname
  2. Notes
  3. Aftertouch
  4. Pitchbend
  5. MIDI Channel (defaults to 1)
  6. VST Param (see below)
  7. Quickedit the VST GUI (send a Bang in here)
  8. Audio L in
  9. Audio L out

Here’s an example patcher that uses the above object.

When this patcher loads, the following steps occur:

  1. The VST called Crystal is loaded
  2. A previously stored synth patch (SadStrings) is loaded into the VST

Four inlets are exposed, used to send MIDI notes (note number/velocity pairs), aftertouch, pitchbend, and MIDI expression (CC 1) values into the VST. Understand that these inlets represent how the VST will respond to incoming values. For example, you don’t actually have to send the aftertouch value from your keyboard into this inlet. If you connect a slider on your control surface into the aftertouch inlet, then the slider will cause the VST to respond to whatever effect is associated with aftertouch.

Now, why does the fourth inlet have the extra object (dhj.vst.midi.CC) in the path? Well, remember I mentioned earlier that all messages to a VST are sent in through a single inlet of the [vst~] object. Among other things, that means you can’t just send raw MIDI data into a [vst~] the way you can send them into an object representing an external MIDI synth.

They have to be wrapped into a special message that consists of the symbol midievent followed by the appropriate number of bytes for the desired MIDI event. For MIDI notes, aftertouch, and pitchbend, this has been done inside the GenericVST (as we will see in a future article). However, because there can be many different CC numbers (128 in fact), it’s not practical to create an inlet for each one, particularly since only a couple are ever likely to be used in practice. We will come back to this object later.

GenericVST Presentation Mode

Let’s first look at what happens if you double-click on the GenericVST in a live patch.

We will examine parts of the internals of this object later. The buttons let you quickly edit the VST, save the (possibly edited) settings and reload settings. By default, the textfield containing the patch name is whatever was initially loaded but you can change the name to something else before you save. If you are actually creating a derivative sound as opposed to just modifing the sound for the main patcher, then you will want to copy the instrument patcher to a new file and then change the patchname message inside it to match your new name.

The parameter fields show you what changes when you adjust parameters in the VST editor. This information is used in conjunction with another object called [VSTParam] so that you can easily associate any slider, knob or button on your control surface with any parameter in the VST. We will examine the [VSTParam] object shortly.

If we click the button “Edit the GUI”, the VST’s GUI editor is displayed.

Now, here’s the key concept to understand. Every parameter in a VST is represented by a unique integer value and the value of each parameter ranges from 0.0 to 1.0 and that’s all. This is true whether you are changing the position of a slider, selecting a different value from a drop-down combo box, or adjusting one of the points in a graphic envelope. Anything that changes the actual state of the VST behaves this way. Buttons and menus that just show you a different view or page of the VST have no effect.

As you change parameters, you can see the index and new value in the Max window. Here are some examples.

Moved Voice 1 all the way to the left

Moved Voice 2 all the way to the right

Moved the yellow point to the right

Mapping MIDI CC data to VST values.

MIDI control change values consist of a controller number between 0 and 127 and a value for that controller, also between 0 and 127. A VST with 1800 parameters (say) will have parameter indices from 0 to 1799 and values between 0 and 1. How then do we arrange for a slider on your control surface to control the Voice 1 parameter in the Crystal VST?

The VSTParam object

Lets look at the purpose one one specific inlet for the GenericVST object by hovering the mouse cursor over it.

As you can see, the inlet expects a MIDIEvent or a VSTParam. OK, so now, here’s a patch that lets you control the Voice 1 parameter from the first slider of an Akai surface.


The AkaiSurface object encapulates a collection of sliders, knobs and button controls and each outlet sends out a single value between 0 and 127 representing the position of the corresponding control. Note that this is NOT a full MIDI message, just a single value. So how does a single value between 0 and 128 get converted into the desired parameter index and value between 0.0 and 1.0 that is required?

First of all, note that the VSTParam object takes a single argument that will represent the parameter index, which for the Voice 1 parameter is 55. Let’s look inside the instanced VSTParam by double-clicking on it.

The first two parameters of the [scale] object represent the minimum and maximum values of incoming data. The second two parameters represent the minimum and maximum values of outgoing data and actual incoming values get mapped linerarly into the required output value. For example, an incoming value of 64 representing the half-way position of a slider would come out as 0.5 which is half way between 0 and 1. The [sprintf] object then formats the parameter and value into a new message which is sent out (and therefore sent into the VST. Note that the [sprintf] object already has 55 in it. That shows up because of how we created the [VSTParam] in the first place with 55 as its sole argument.

So if you want to control the filter cutoff frequency, resonance, LFO frequency and perhaps the filter decay from an ADSR, then all you need to do is “wiggle” those parameters on the VST, watch what value is displayed in the parameter index, then create a few [VSTParam] objects with the associated parameter indices and connect them up. For example:

To encapsulate this into a standalone synth that exposes just these parameters but can be controlled from different surfaces (say), just replace the inputs to those VSTParams (and the other inputs of the GenericVST itself) with inlets as follows.

I saved this patcher with the name LeadSaw and now I can create a new patcher that just uses this one.

This new instrument can now be used just like any external MIDI instrument by connecting keyboards and surfaces as desired. For example, here is a complete patch that uses my Yamaha AN1x to control this synth where the the modwheel is used to control the envelope decay and my expression pedal controls the filter cutoff frequency, which is the essence of a wah-wah pedal. The first three ports (outlets to inlets) are notes, aftertouch and pitchwheel, which is my standard for all objects representing keyboards.

In part 4, we will disect the GenericVST object itself.


The earlier articles are

Part 1

Part 2

Categories: Music Technology Tags: